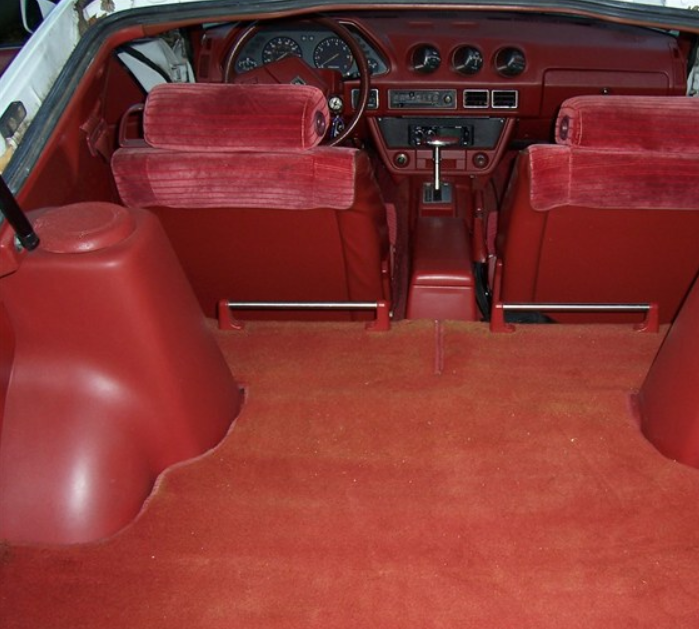
When you are dealing with a classic vehicle like the 280ZX, it is likely that many aspects of your Z-car could use some significant cosmetic upgrades. One aspect that frequently needs replacement is the 280ZX’s carpet — after years of use and possibly abuse via poor weather and storage conditions, the carpet may be frayed, smelly, ripped, moldy, or maybe even non-existent! Fortunately for you, replacing the carpeting in your 280ZX is both simple and cheap. With a carpet kit from a reliable retailer, you can significantly improve the interior and overall look of your 280ZX.
Quick note for my readers: some of the links on this page may be affiliate links, meaning I receive a commission (at no extra cost to you) if you click on the link and make a purchase. I only recommend products I’ve used and trust unless stated otherwise.
Of course, the most important factor to consider is whether or not the carpet kit you’re purchasing will actually fit. There are many different carpet kits on the market kit and unfortunately, not all will actually fit into a stock 280ZX well. We’ve tested a few of the most prominent carpet kits on the market and have found that one set in particular fits very well and comes at an affordable price.
Best Fitting 280ZX Carpet Kit

We sell a 280ZX S130 carpet kit serves a full replacement for your entire interior carpet from the floor to the rear deck. This kit also comes with flexible polyurethane backing that will filter out noise and vibration, and serve as an extra layer of insulation for your interior. This particular carpet kit also comes with a driver’s heel protective panel, just like the original 280ZX carpet.
Once installed, the carpet will cover the entire visible floor area — it’s a complete replacement. In our experience, this carpet kit has very accurate measurements and will fit serve as a perfect replacement for an older, original carpet kit. You may need to trim the edges a bit, but again, this set naturally seems to fit better than anything else on the market.
Do I need sound-deadening?

Another factor to consider is whether or not you will also need some sound-deadening with your carpet kit. While the carpet kit we recommend does come with polyurethane backing, a solid application of sound-deadening will make a huge difference in the actual sound insulation of the car. Sound insulation serves two purposes, to keep your interior audio inside the car so you don’t have to crank-up the radio to hear it well, and to filter out any road noise.
For such a low price point, and since you already have the interior ready for carpet installation, it only makes sense to also purchase some sound-deadening and some Headliner & Fabric adhesive from 3M that will allow you to adjust your coverage and application of the sound-deadening without it adhering fully too soon. You may also want to purchase a roller like this one to help you apply it evenly.
Carpet Kit Installation

Installation of the carpet kit is a relatively straightforward process. You’re going to want to remove the seats, moldings, the center console, and really anything that is in the way of you accessing the current carpet. Remove the existing carpet carefully and any panels or sound-deadening that you might find underneath. With all of that removed from the floor, thoroughly clean the entire surface so you can get a strong adhesive connection.
Install the sound deadening by applying Headliner & Fabric adhesive from 3M to both the sound-deadening and the floor itself. Carefully apply it to the entire exposed surface and use your roller to ensure even application and to eliminate air-bubbles. Not only will this make a massive difference in sound insulation, but it will serve as a great even surface on which you’ll be applying the new carpet kit, so be sure to take your time on this step.
Line up your carpet kit without any adhesive to see how it falls onto the sound-deadening as a surface. If you’re going to be doing any trimming, now is the time to do so. If your carpet kit does not appear to be lying flat or isn’t workable enough, you can lay it out in the sun for a few hours or go over it with a heat gun to make the carpet more malleable. Don’t forget that you’ll need to install the interior components back once the carpet is installed — you’re going to want to test that everything fits well so you don’t have to redo anything. If any of this seems foreign to you, check out this video produced by our friends at Hagery. The video is not of a 280ZX but will serve as an excellent general guide to this process.
And with that, you’re done! Hope this guide served as a helpful reference to you in improving the interior of your 280ZX.
