When I first bought my 240Z, the first relatively serious issue I noticed with my new Z-car, was a very finicky and difficult ignition switch. There is a great reproduction ignition switch on the market that we sell on the ZCarGuide store. The actual replacement process took some time, but in general my new ignition switch (and new set of keys) was back to new in no-time. If you have a similar issue and would like to replace your ignition switch, read on as this will be a quick guide to doing just that.
We offer a video version of this guide on our YouTube channel which is also embedded at the bottom of this page.
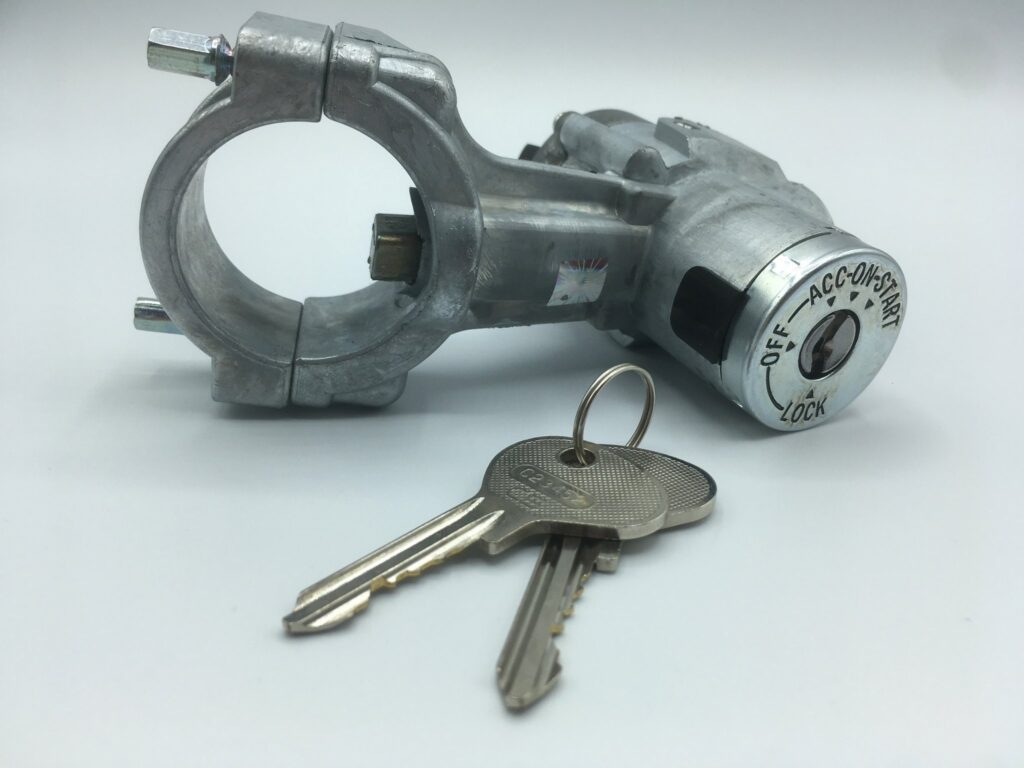
Recommended Replacement Ignition Switch
The exact part that I used on my 240Z is now available from on the ZCarGuide store. I was so pleased with the high quality of the reproduction ignition switch that when I started my store, I tracked down the manufacturer of this part and now I make sure I always have some in stock as this seems to be one of the most failure-prone original parts on the S30. Note that this will fit the 240Z, 260Z, and the 280Z, and all model years within these models. This ignition switch comes with two keys. Please note that this ignition switch does not support the key-in-igniton buzzer.
Removing your old Ignition Switch
Start by disconnecting the battery as we will be working close to some wiring. It is always good practice to disconnect the battery when doing anything that could even vaguely be described as electrical work. The battery terminal bolt has a 13mm or 1/2″ head.
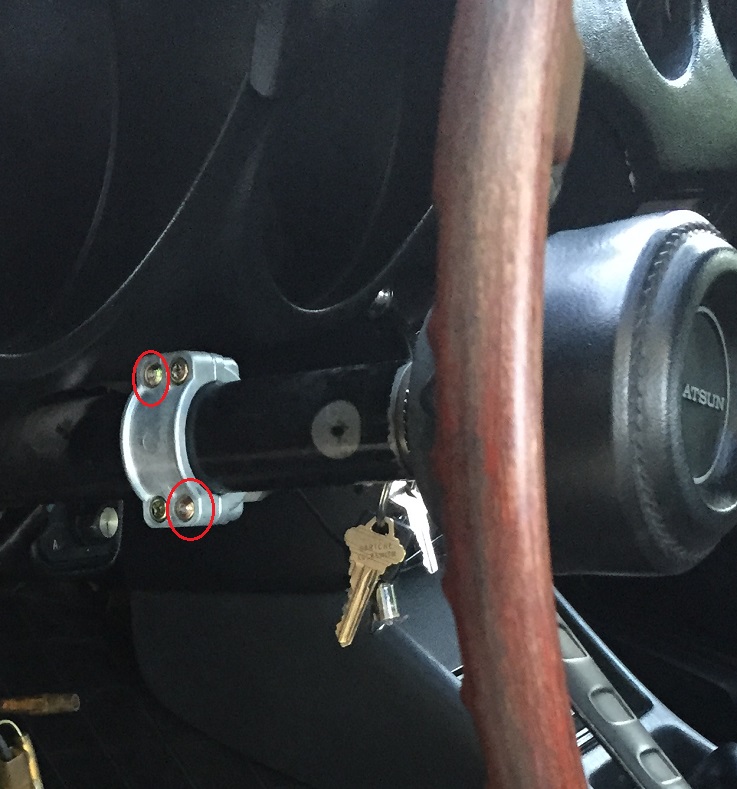
To reveal the ignition switch that needs replacing, you need to remove a few screws that join the top and bottom halves of the plastic housing around the steering column. The screw heads will be on the bottom. When you remove these, be sure to keep track of which hole they came from as they are different sizes.
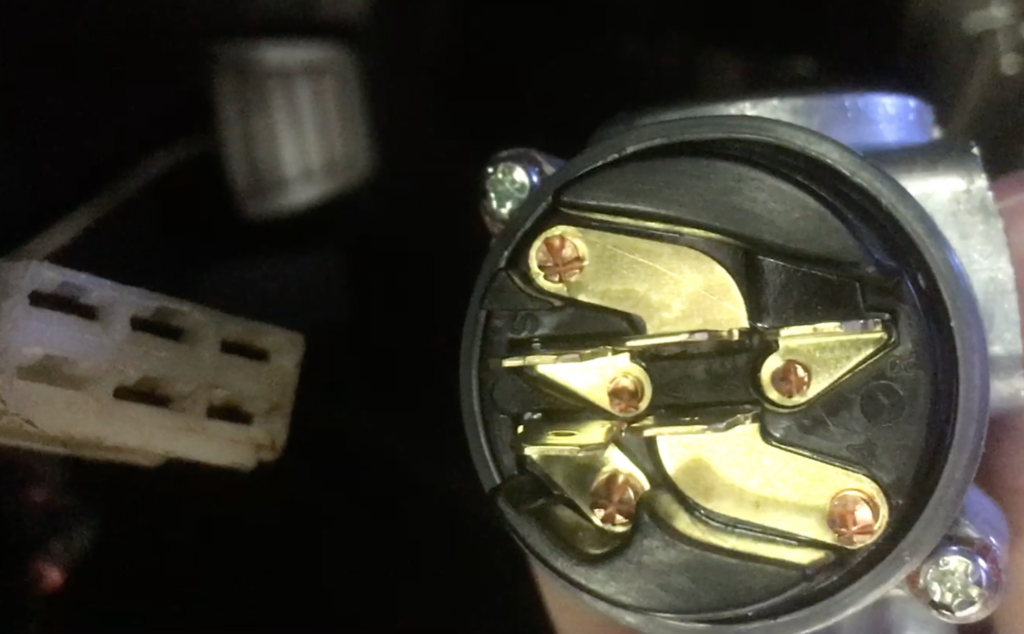
With the ignition switch assembly exposed, simply remove the plug so that you can completely remove the old assembly once you have detached it from the steering column.
You will see the actual ignition switch is attached to the steering column with four screws. However, it is likely that two of them are ‘shear’ bolts with no clear screw slot. This was a safety feature that prevented would-be thieves from simply detaching the switch assembly and manually picking the steering column lock. The way these work, is that it originally had a hexagonal head that would shear off after a certain amount of torque. Your replacement switch will also come with two replacement shear bolts, but more on that later.
Removal of the regular Phillips head screws is straightforward, but you may need to use a long screwdriver to get enough leverage on the top screw, as a shorter screwdriver may end up clashing against the dashboard.
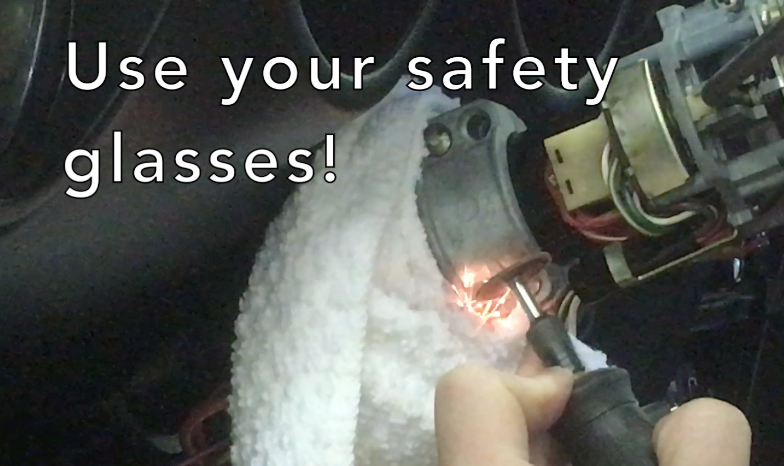
To remove these shear bolts, you will need a Dremel. You will need a cut-off wheel attachment like this one. If you don’t already have a Dremel, I highly recommend you consider purchasing one just for general use. Not only is it pretty important for this repair, but I consider my Dremel to be one of the most useful tools I have in the garage. On Amazon, the Dremel 4300 offers a great package that includes a starter kit of over 40 accessories, a.k.a. you won’t need to go back to Home Depot every time you want to use it for a new job!
Before operating the Dremel, put on a pair of safety glasses. With the Dremel, simply attach a cut-off mandrel and cut a new horizontal slot across the face of the shear bolt head. It shouldn’t take much force or time, but just be careful that you do not cut into anything else as there are a lot of wires and sensitive pieces around this area. Cutting the top screw will require your Dremel to be dangerously close to the dashboard, so use extreme caution there. I would also recommend that you place a shop rag around the wiring and parts of the dashboard that will be exposed to flying sparks.
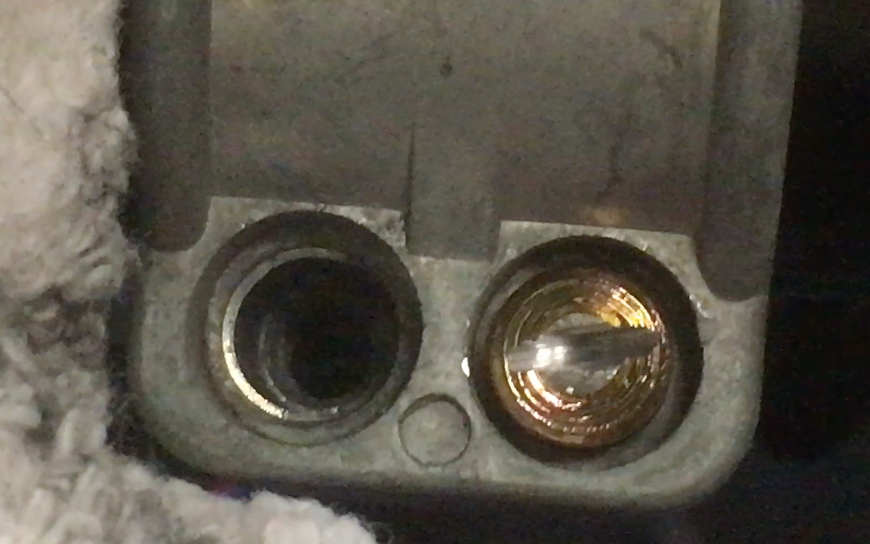
Use a flat head screwdriver to remove the two shear screws now that you have cut a slot in. With all four screws removed, the switch assembly should separate into two pieces allowing you to remove it from the steering column.
Installing your new Ignition Switch
At this point, simply repeat this process in reverse with your new ignition switch. One thing to look out for: make sure you have the switch oriented correctly so that the steering lock aligns. It is likely that there will be some evidence of where the old ignition switch used to be — some discoloration, wear, etc. Attaching the new assembly with the four screws should be straightforward. Since your replacement part comes with the two shear screws with 7/32″ hexagonal heads, simply tighten until the head shears off. I found that with the top screw which is more difficult to access, I needed to use a small crescent wrench for the last few turns before the shear head came off.
At this point you can plug in the electrical connection, taking care to ensure the 5 terminal connections go into the correct holes of the cable connector. If any of the connections are bent, you will need to gently bend them into place.
Reattach the plastic housing pieces, making sure to use the same screws for the same holes.Finally, you will want to ensure the ignition switch operates correctly, so try the key in the accessory position and of course switch the ignition on.